


Medicine Making: Plantain Salve
An easy introduction to medicine making (that's immediately applicable to kids!)

Before we get started on the project, I wanted to share an excerpt from the Eco Life Skills zine:
Being a good neighbor
Being a good neighbor to everyone who lives around us is the most important thing we can do to make sure we get what we need in the future. Whether they’re humans, different animals, or plants, all the beings that live near one another depend on eachother. If we only take from our neighbors and don’t give anything back, we’ll use up (or “consume”) all of the resources in our area, and it will be harder and harder to get what we need. If we help eachother and are always looking out for one another, we can make sure everyone has plenty. To do that, we have to think carefully about what we take and how to give something useful back in return: This is called “reciprocity”.
Share something you made!
I have a challenge for you, kids and grownups! For every project you do in this zine, try to find someone who lives near you that you don’t already know all that well to share a little of what you make with. It could be:
someone who lives on your street or in your building
a kid, teacher, or staff member (like a janitor) at your school, co-op, or after school program
a librarian
someone who works in your neighborhood, like a trash collector or a post officer
Sometimes people we want to share with say no
And that’s okay! Maybe it turns out that they don’t need or want what we have to share, or maybe they’re not used to people sharing with them. Whatever the reason, it’s not our fault. It’s okay to feel sad or disappointed, but we didn’t do anything wrong. Our neighbors say “no” sometimes when we want talk to them, ask them for things, or give them things, and that’s normal. We can say “Okay then!” and move on with our day. Offering to share something, being told “no”, and moving on is important practice for being good neighbors, too.
What’s Herbalism?
Herbalism is the practice of using the healing properties of plants. Before modern pharmaceuticals, almost all medicines were made of plants, and a few were made from animal products or minerals. A lot of medicines are still plant-derived today; the process is just a little bit more complicated.
There are herbal traditions from all over the world that use different kinds of plants prepared different kinds of ways to cure all sorts of different diseases. The projects in this zine are easy, simple herbal “preparations” that fall into a category some people call “comfort care”. They’re meant to help us out when we’re a little sick or injured, but they aren’t meant to treat anything more serious than a cough, a mild rash, or a scraped knee. Most of all, these projects are to help you have fun and learn some basic skills you can use if you want to make more herbal medicines in the future!
Plantain Salve (for bugbites and scrapes)
Plantain is a small, weedy plant that grows in grassy and disturbed areas like lawns and parks. There are two kinds, and you can use either one (or both!):
Narrow-leafed plantain:


Broad-leafed plantain:


Narrow-leafed plantain has long, pointy leafs. Broad-leafed plantain has shorter, fatter and rounder leafs with slightly more rounded points. Both types have thick, stringy, straight veins running all the way through them.
You can find this plant in grassy areas like lawns and parks. It even grows up through sidewalks!
For grownups: It’s understandable to be worried about pollution and plants from places like lawns or parks not being clean enough to eat or use. With plantain, it’s good to remember that if it’s growing in grass your kids are rolling around in, they’ve already got whatever is in the grass on their skin; so it’s fine to put a salve made from it on unbroken (not bloody) skin.
Herbalists call plantain mucilaginous, vulnerary and astringent. Mucilaginous means that it has slimey juice that’s good for your skin, especially if your skin is dry or chapped. Vulnerary means it’s helpful for healing wounds; and astringent means that it causes your cells to shrink up a little bit, which in this case can help with inflammation that might be itchy or painful. All of this means that plantain is super good for bug bites!
For grownups and bigger kids: We can also use plantain salve on scrapes, cuts, other small wounds, and small first-degree burns; but we want to remember a few rules. 1) Whatever jar we’re using to keep plantain salve in to put on broken skin has to stay very clean. That means washing our hands before using it and storing it in a safe place, like a cabinet. 2) Plantain heals skin from the outside in; which means it’s great for anything shallow, but if we put it on a deeper cut or a puncture wound it will heal the skin on top before it heals the tissue below. This means the wound can’t drain fluids properly and can cause more problems than you started with.
A salve is a type of medicine made of oil and wax that you rub on the skin, kind of like a lotion. You’ve already used a salve before: Lip balm! Lip balm or chapstick doesn’t usually have herbs in it, except for some brands like Burt’s Bees that have essential oils in them. (We’ll talk about what essential oils are in a later project.) Even though it usually doesn’t have herbs, lip balm is still a mixture of oil and wax we put on our skin to heal it, and that makes it a salve.
There are a lot of different ways to make a salve. The cool thing about the way you’re about to learn is that it can be used with any herb you can make a salve out of (we’ll talk about why you can’t make salves with some other herbs in a different later project).
You can choose one of two different recipes to make your plantain salve: You can make it with two ingredients, a liquid oil and a wax, or one ingredient: Petroleum jelly.
Method one: Liquid oil and wax
Note for grownups: You don’t have to do this project all at once! It can be broken down into sessions if your kids have short attention spans, and/or if you’re doing this project with a group of kids in a class, co-op, camp or playgroup. I’ll tell you where the stopping points are throughout the directions, what to do to clean the project up so it’s ready for next time, and how long you can wait between each stopping point.
Ingredients
A “neutral” liquid oil. Olive oil works great; so does sunflower seed oil, grape seed oil, or any nut oil. Canola oil and vegetable (soy) oil work fine in a pinch, but aren’t as good. You’ll probably need about half of a cup, unless you pick a LOT of plantain.
Beeswax or paraffin wax. Beeswax is better, because paraffin can cause some damage to skin cells, and some people are allergic to it. It’s okay to use paraffin if that’s all we have, though, since plantain is beneficial enough to still be a “net positive”. You’ll need about one tablespoon of wax pellets, or solid wax chopped up into itty-bitty pieces (about an 8th of an inch). You can buy beeswax online, or get paraffin (the brand is “gulf wax”) in the canning section of the grocery store.
Grownups: Some people will tell you to grate solid bars of wax with a cheese grater. This is a terrible idea, your cheesegrater will either never become clean again or you’ll have to boil it in a pot of water to get the wax off. It is worth it to spend a little more time chopping the wax up fine (it doesn’t have to be perfect) with a knife and then scrub the knife in very hot soapy water, instead of trying to clean a waxed cheesegrater in the future. That is, unless you feel like buying a craft cheesegrater that’s only used for things like wax, or soap (for making your own laundry detergent!).
Tools
A clean work surface
A clean glass jar (recycled food jars work great, so do mason jars)
A liquid measuring cup
Measuring spoons
A small saucepan (and stove or hotplate) for the hot infusion method, OR a brown paper bag (like a sandwich bag) and a permanent marker for the cold infusion method.
A mesh wire strainer (like a teastrainer) OR a coffee filter and a rubber band (or, a pour-over coffee maker and filter).
Something to put your finished salve in, like a short jar, a small sturdy tupperware, or lip balm tubes.
Cleaning supplies
Paper towels (or rags, but they’ll get pretty goopy and you will need a lot)
¼ cup salt
About a cup of vinegar
Dish soap
Directions
Gather your plantain!
Find a description of plantain in a field guide or online and identify some in a lawn or park nearby, and pick some! You’ll want about one cup, if you were to mash all the leaves into a cup measure fairly tightly.
Here is a page with good ID pictures for broad leaf plantain: https://weedid.cals.vt.edu/profile/336 and here is one for narrow leaf: https://weedid.cals.vt.edu/profile/313

.
I gathered mine in a plastic grocery bag. It had a rip in it so I tied the handles together and used the rip as the opening.
Plantain isn’t rare or endangered, but we still need to be good, careful neighbors when we harvest it. Don’t rip up entire plants! Only take about 1/4th of the leafs off any given plant—less if it’s very little. If you accidentally pull up a whole plant, make sure you put the whole thing back. Nestle it down into the ground again to re-plant it.
Take your plantain home and make your salve!
Stopping point: you don’t need to make the salve on the same day you pick the plantain, but do it soon. Put your leafs in the refrigerator if it will be more than 24 hours, and make the salve within one week of picking.
Making the infused oil
Before we make a salve, we need an infused oil to make it out of.
For big kids and grownups: Think about making a cup of tea: when you pour the hot water over the teabag, it changes color. That’s because the molecules in the plant that give it color (called “pigments”) are leaving the plant and getting dissolved in the water. Other molecules are getting dissolved too: The ones that give the plant smell and flavor, and the ones that have medicinal properties. This same process happens any time we put an herb in a liquid, whether that liquid is water, oil, or something else like vinegar or glycerin (more about glycerin later).
Get your plantain leaves ready by laying them out on a clean surface (like a table or cutting board) and picking out any grass or other plants that might have snuck in while you weren’t looking. Also pull out any dead or brown leafs

.
Next, rip your plantain into little pieces, like the pile on the right
:
Then, “bruise” the leafs by rubbing them between your hands and ripping them up more. Go nuts!

Put all your little leaf bits into a clean glass jar and then poke them down with a spoon so they all sit at the bottom nice and tight.

Pour oil over the bruised leafs until it covers the leafs by about ¼ inch. They’ll float a little bit, that’s fine. You just want about ¼ inch more oil up the side of the jar than the plantain goes. It doesn’t have to be exact.

Now, you have two options.
Use the “cold infusion” method. you can put a tight lid on the jar, and put it inside a brown paper sandwich bag. Use a sharpie to write the date, the type of oil you’re using, and “plantain” on the bag. The bag protects the plants from sunlight, which can destroy some of chemicals that make it medicinal. Put the bag somewhere like a pantry or cupboard for about one month, and then strain your oil and make the salve as directed below. This might be a good choice for little kids with shorter attention spans.
Use the “hot infusion” method below to have your oil ready on the same day.
Stopping point: You can wait a few hours, days, or a couple of weeks between putting your plantain and oil in the jar, and using the “hot infusion” method. Just make sure to label your jar and protect it from light like the directions in the “cold infusion” method, and then take it out to finish up with the “hot infusion” method when you’re ready.
Hot infusion method
Put your jar in a small saucepan. Fill the saucepan around the jar with water, and put it on a stove on “low” heat.
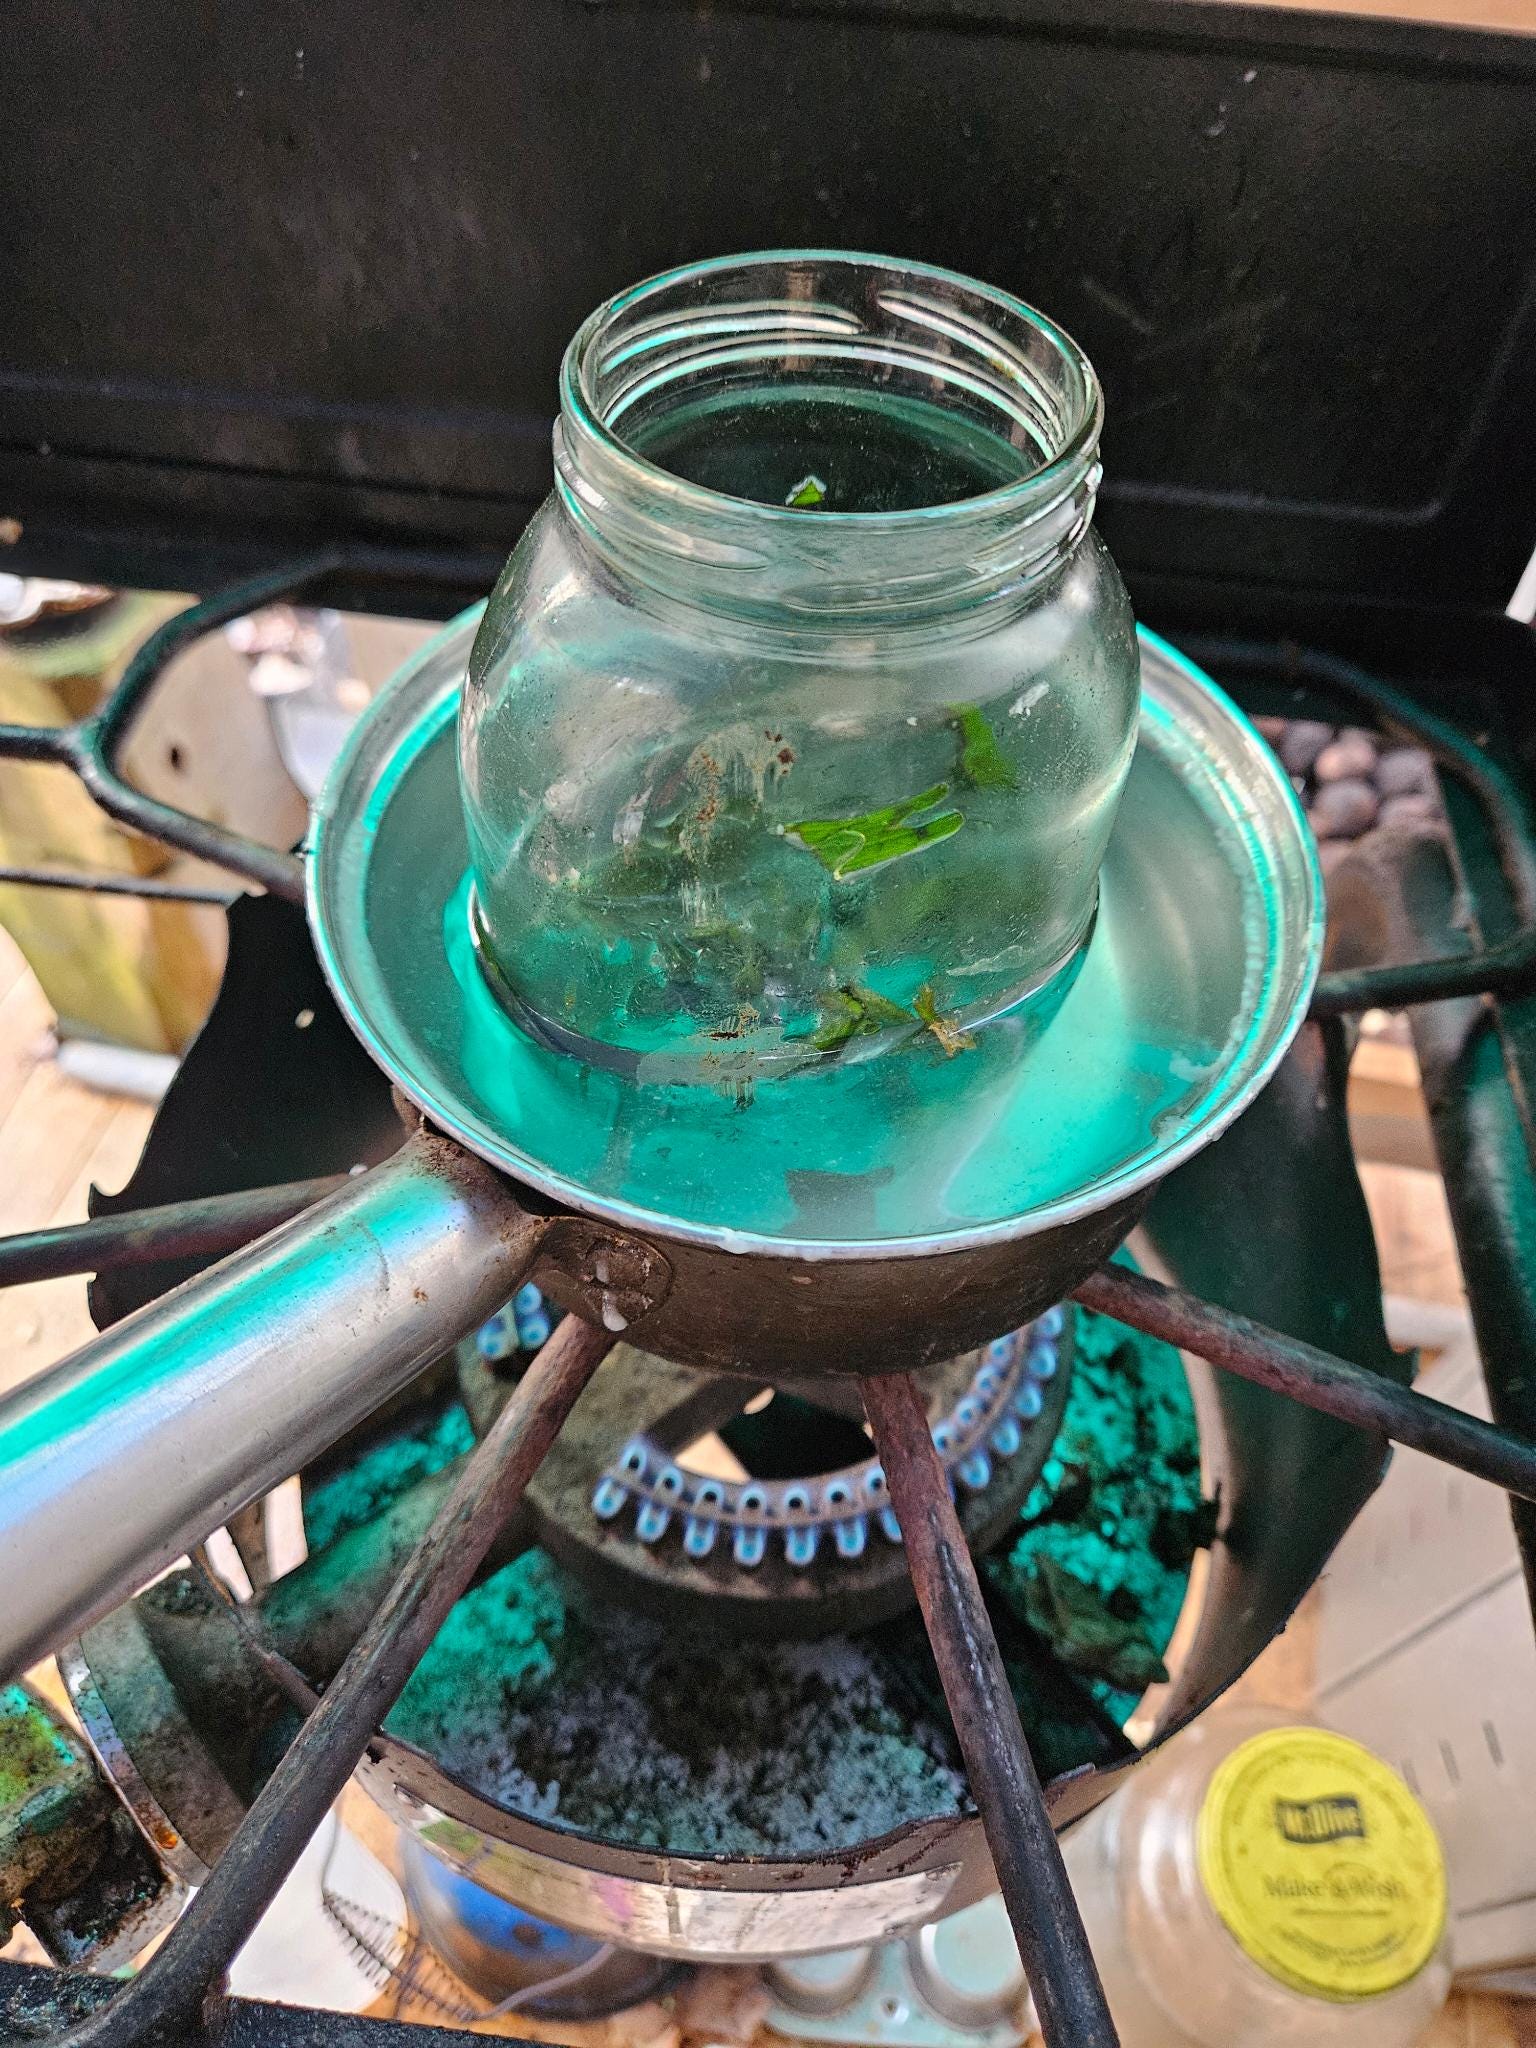
For big kids and grownups: This is called a “double boiler”. We use it any time we’re heating oil in medicine making. Think about a pan full of hot oil and vegetables, or a deep fryer full of french fries. The oil bubbles and sizzles and fries the plants in it. This is delicious for potatoes, but bad for medicine. Just like sunlight can destroy some of the chemicals that make plants medicinal, heat can too! When we use a double boiler, we’re taking advantage of the fact that water boils at a much lower temperature than oil. It keeps the whole pot a nice warm temperature that makes it easier for the medicinal chemicals (herbalists call them “constituents”) to dissolve into the oil, but doesn’t burn them away.
That warm temperature is why we can make a hot infused oil in a few hours, but a cold one takes all month. If you want to see the difference temperature makes in how fast herbal constituents dissolve, get three tea bags. Put one in cold water, one in warm tap water, and one in boiled water (like how you make tea normally). Wait five minutes, and look at the different colors of the liquid. You can also take a sip from each cup and notice how different they taste!
Make sure you leave the lid off the jar.
Let the oil cook in the double boiler for about two hours. If the water starts to boil, it’s getting too hot! Turn the heat off for ten or fifteen minutes to let it cool down before setting the stove back to low.
Stopping point: You can put the lid back on the jar and leave it overnight or for a few days before straining it and making the salve.
Straining the oil and making the salve
If you used the cold infusion method or took a break before straining out your oil, it’s a good idea to heat the oil up a little bit before straining it—this will make it a thinner liquid and your straining will go faster. Just put the jar in a bowl of hot tap water for about 15 minutes, or back on the double boiler for 5 minutes.
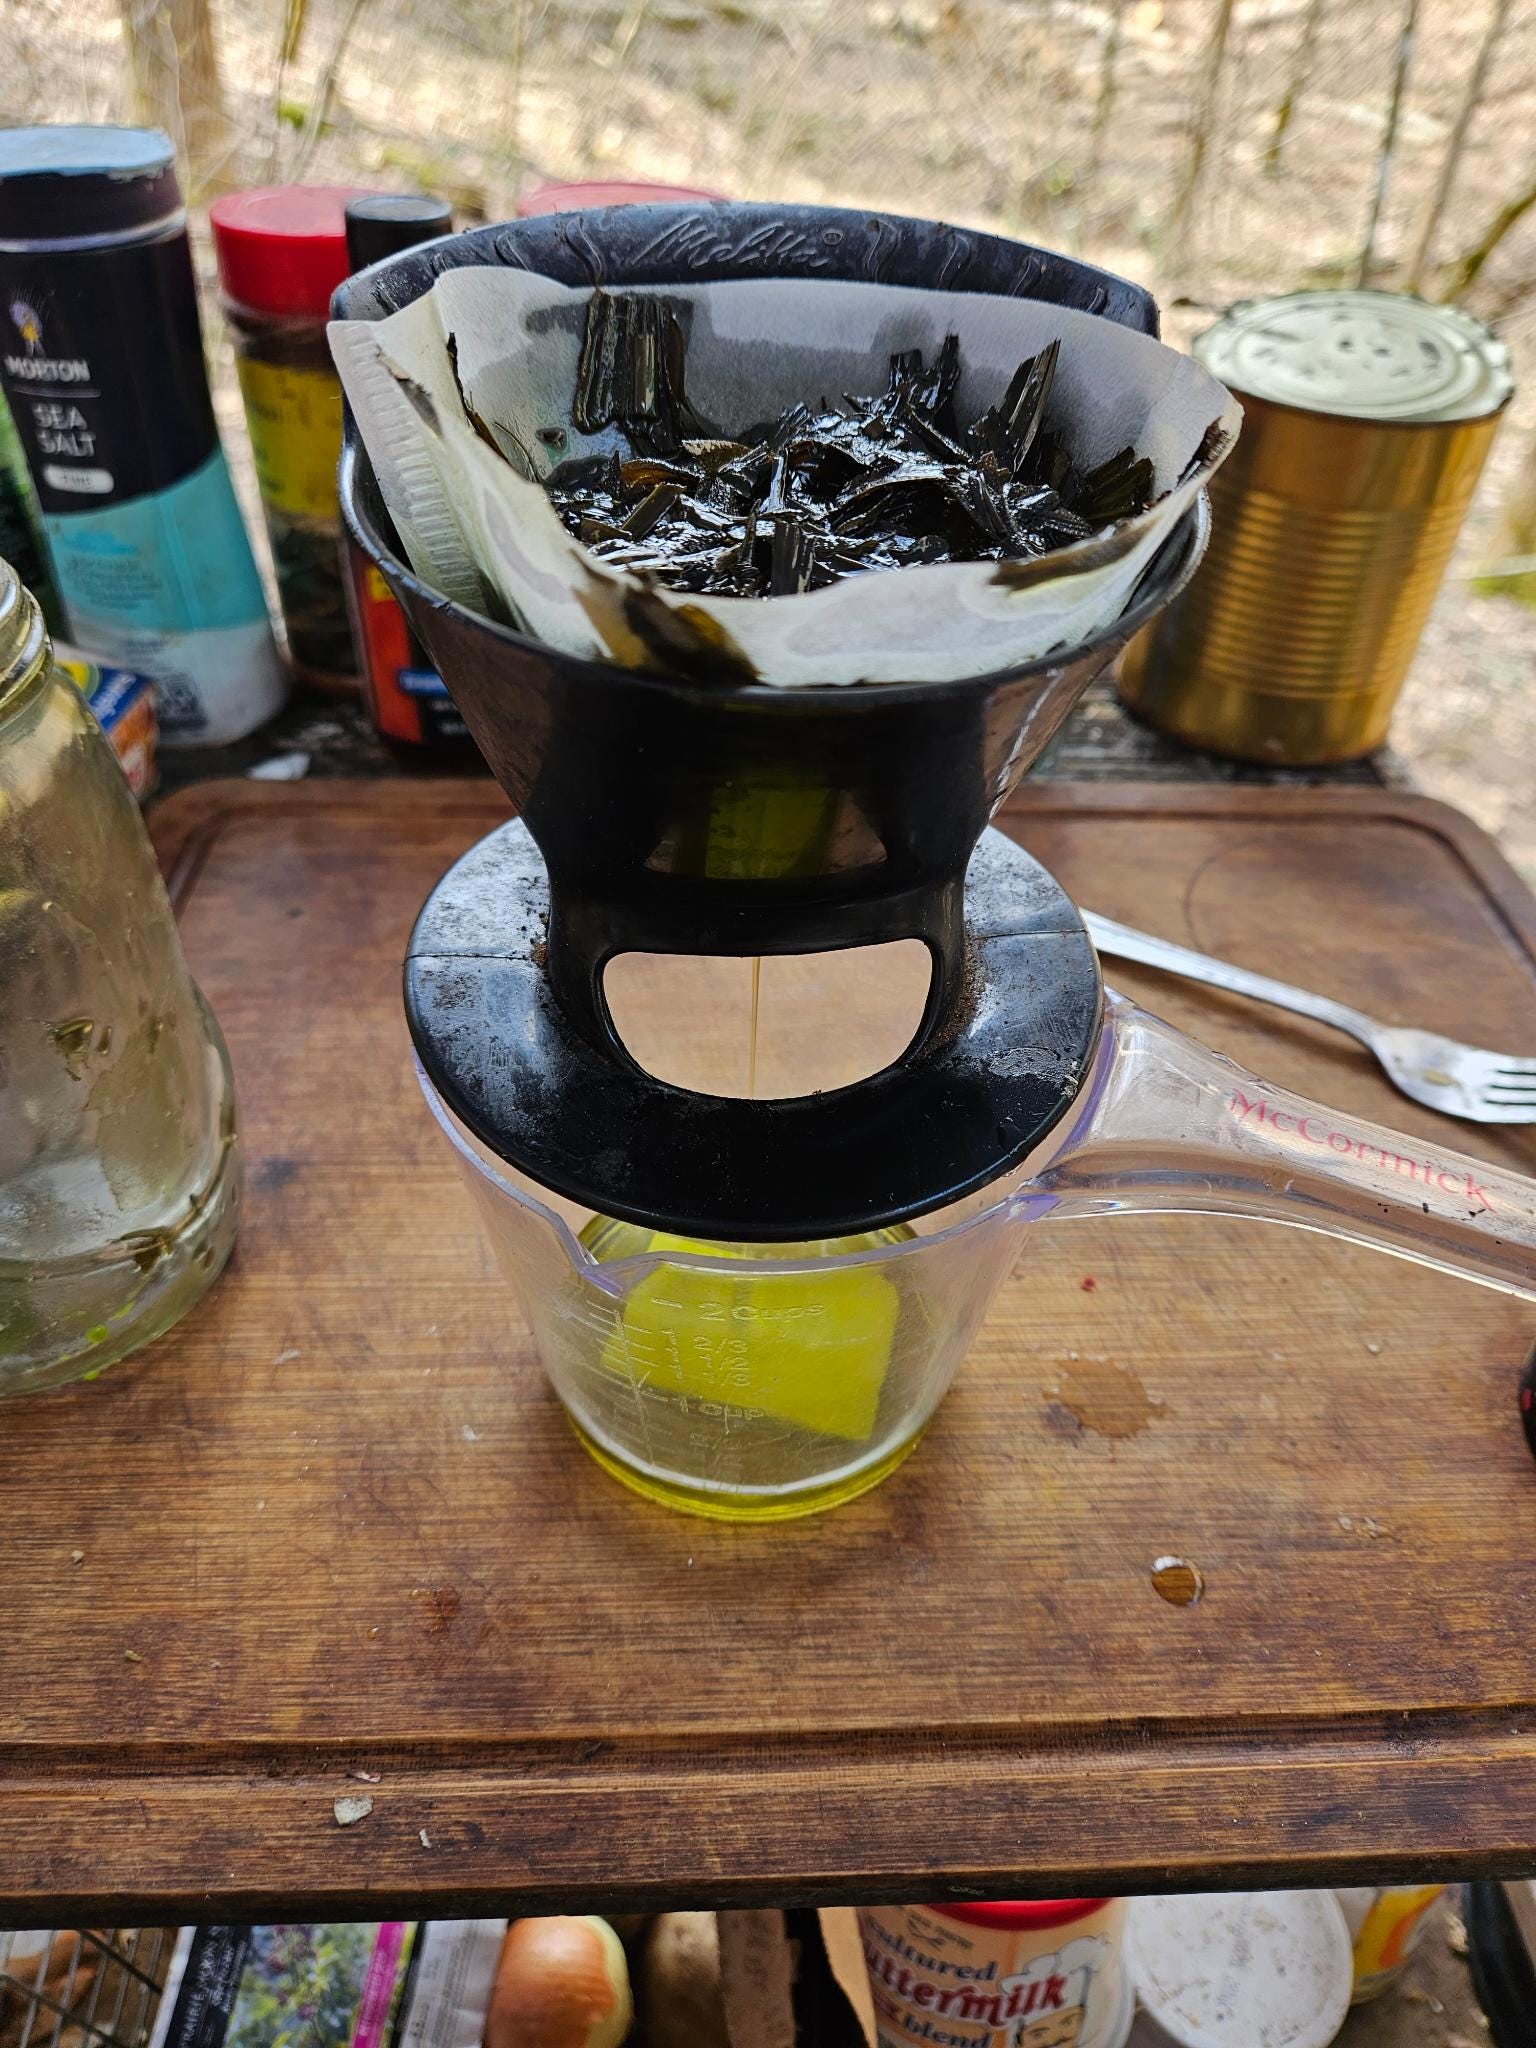
Use a tea strainer or coffee filter to strain your oil into a liquid measuring cup. If you’re using a regular coffee filter and a rubber band, it might be easier to strain the oil into a 2nd clean glass jar and then pour it into a liquid measuring cup after. Nest the coffee filter in the top of your jar so it makes a little bowl and then fold the edges of the filter over the sides of the jar and secure it with a rubber band.
Slowly pour your warm oil into whatever you’re using to strain out the leafs.
Next, measure how much plantain-infused oil you have.
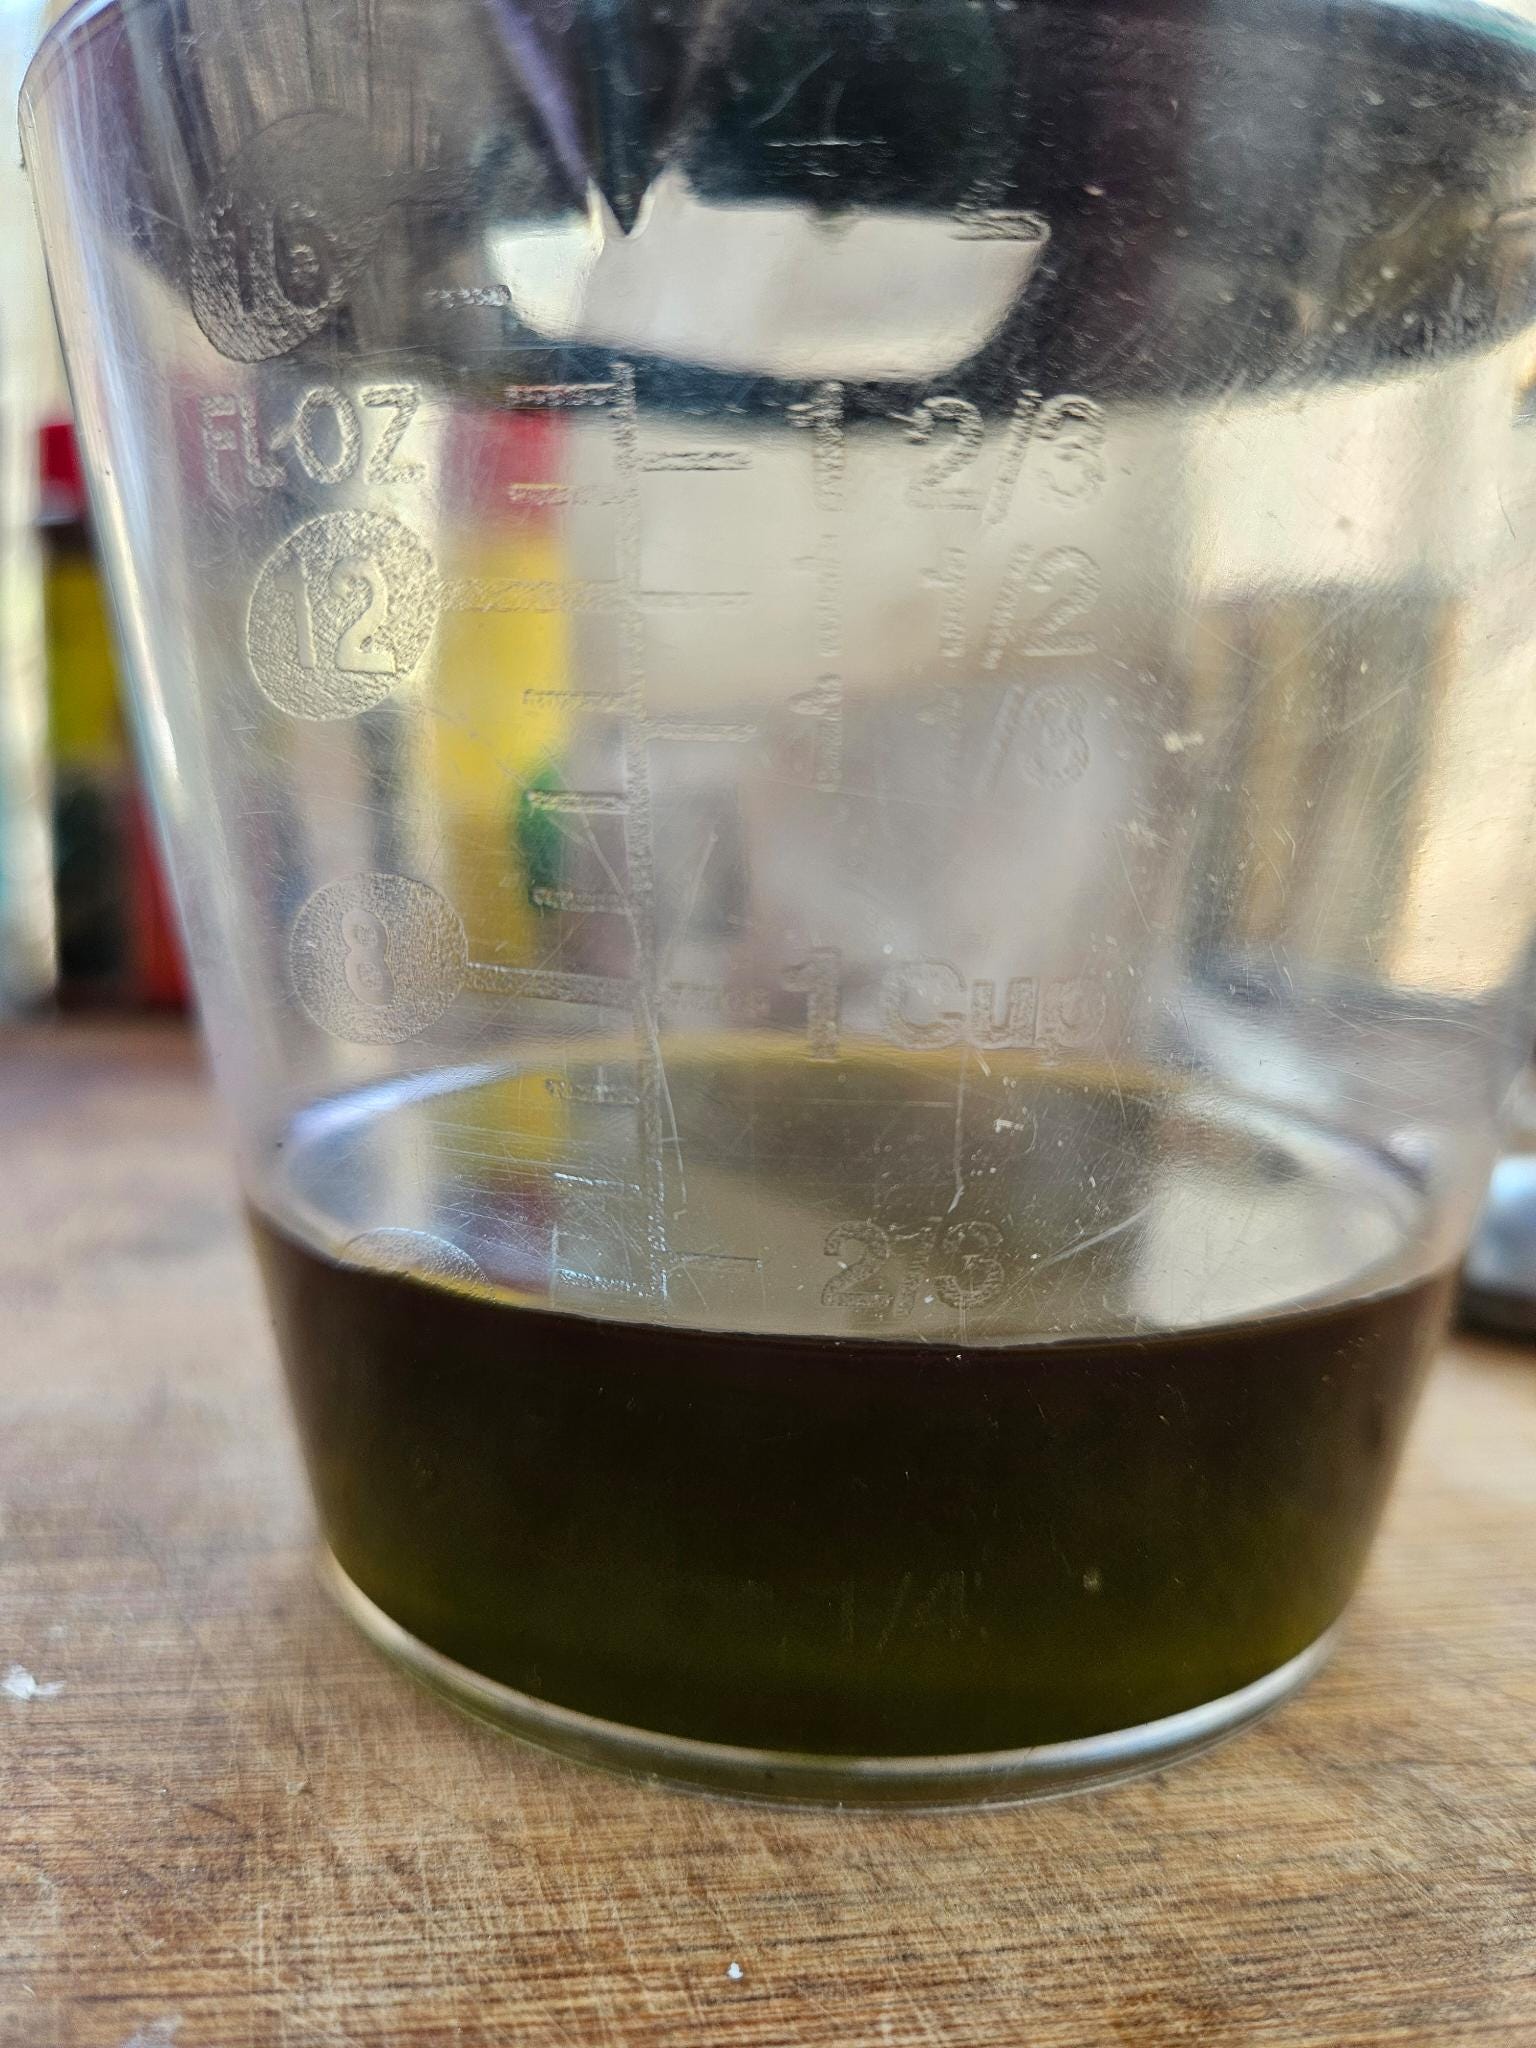
I have between ½ and 1/3 of a cup, so I’ll use 1 tablespoon of wax pellets.
Wipe any leftover plantain leafs out of your jar (or grab a clean one!) and put it back in the double boiler on MEDIUM-LOW heat. Measure out and add your wax to the jar and let it melt. You want about one tablespoon of wax pellets or pieces per ½ cup of infused oil (or in other words, one and a half teaspoons per ¼ cup). It doesn’t have to be exact!
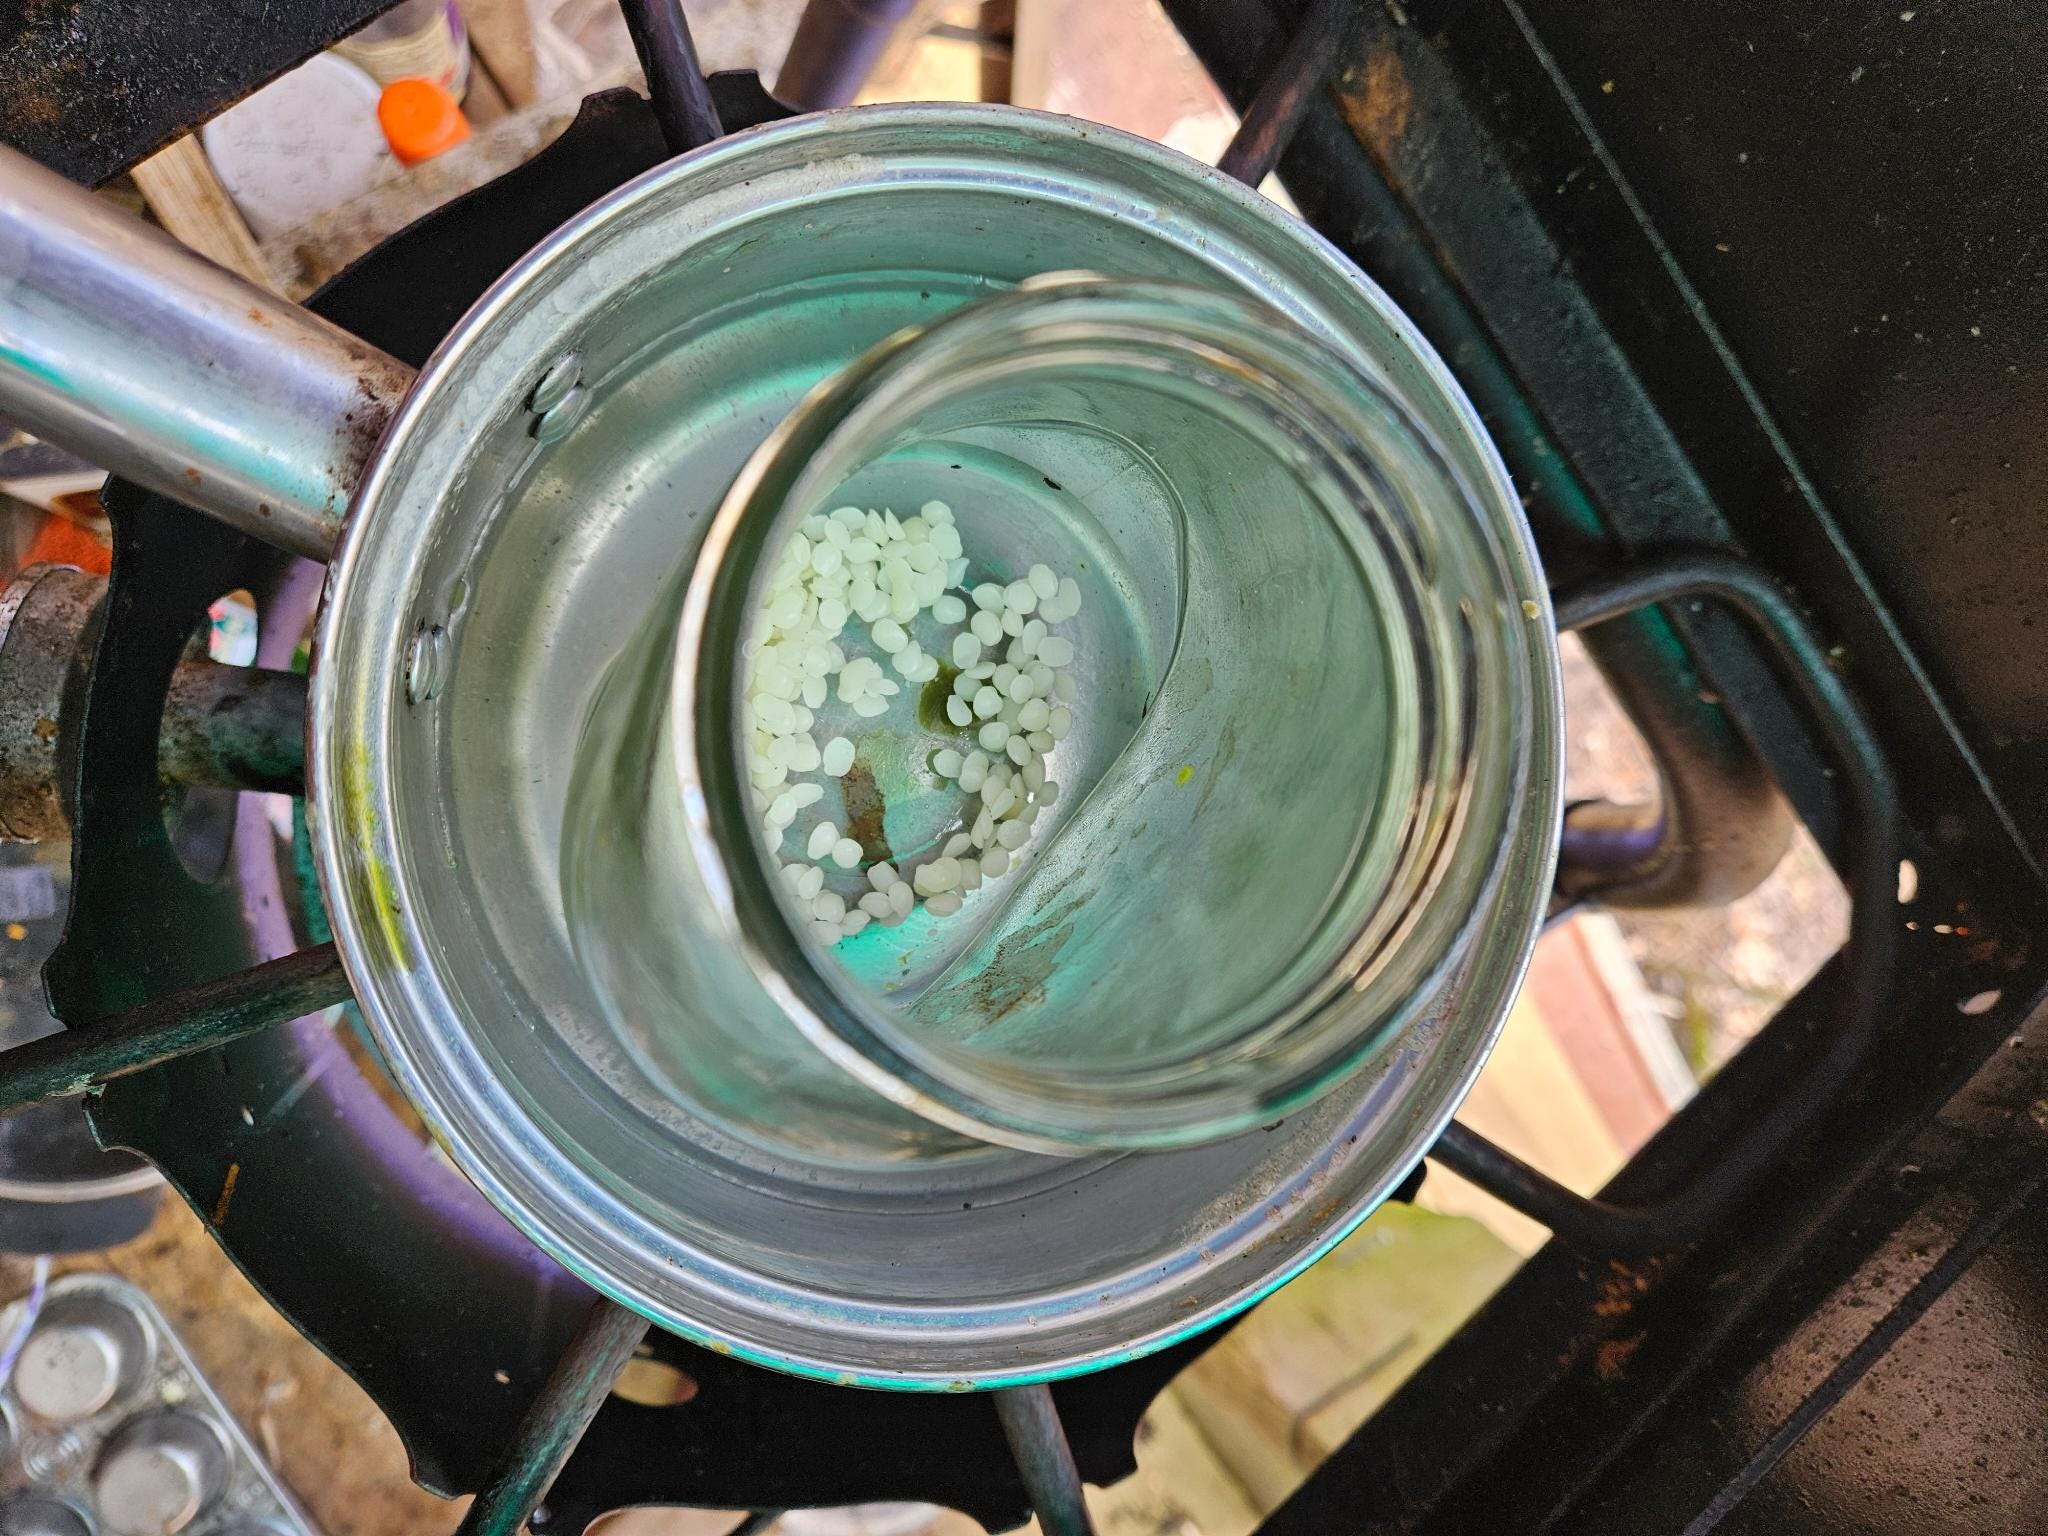
Next, pour your plantain oil into the jar, a little bit at a time. It might cool down the melted wax and make it temporarily solid again. It looks a little funky, but it’s perfectly normal.


Let the wax melt into the oil. Pick up the jar and gently swirl it around a few times to make sure it’s completely mixed.
Once the wax is all melted and you’ve mixed it up, your salve is done! Pour it into whatever container you’re using. I used lip balm tubes, because they’re nice to rub on bug bites while I’m out and about. Plantain salve can also be used as lip balm, but it does taste like grass.
As your salve cools, it will turn from a clear-ish liquid to an opaque, creamy solid. This might take a couple hours. Then, it’s ready to use!
Make sure you label your container with the date and all the ingredients you used. If it’s stored in an air-tight container, your salve should be good for six months. If for any reason it starts to smell funky before then, the oil has gone rancid. “Rancid” oil isn’t rotten like other types of food, and it’s not dangerous: it just means your salve got exposed to too much air and the medicinal constituents aren’t good anymore.
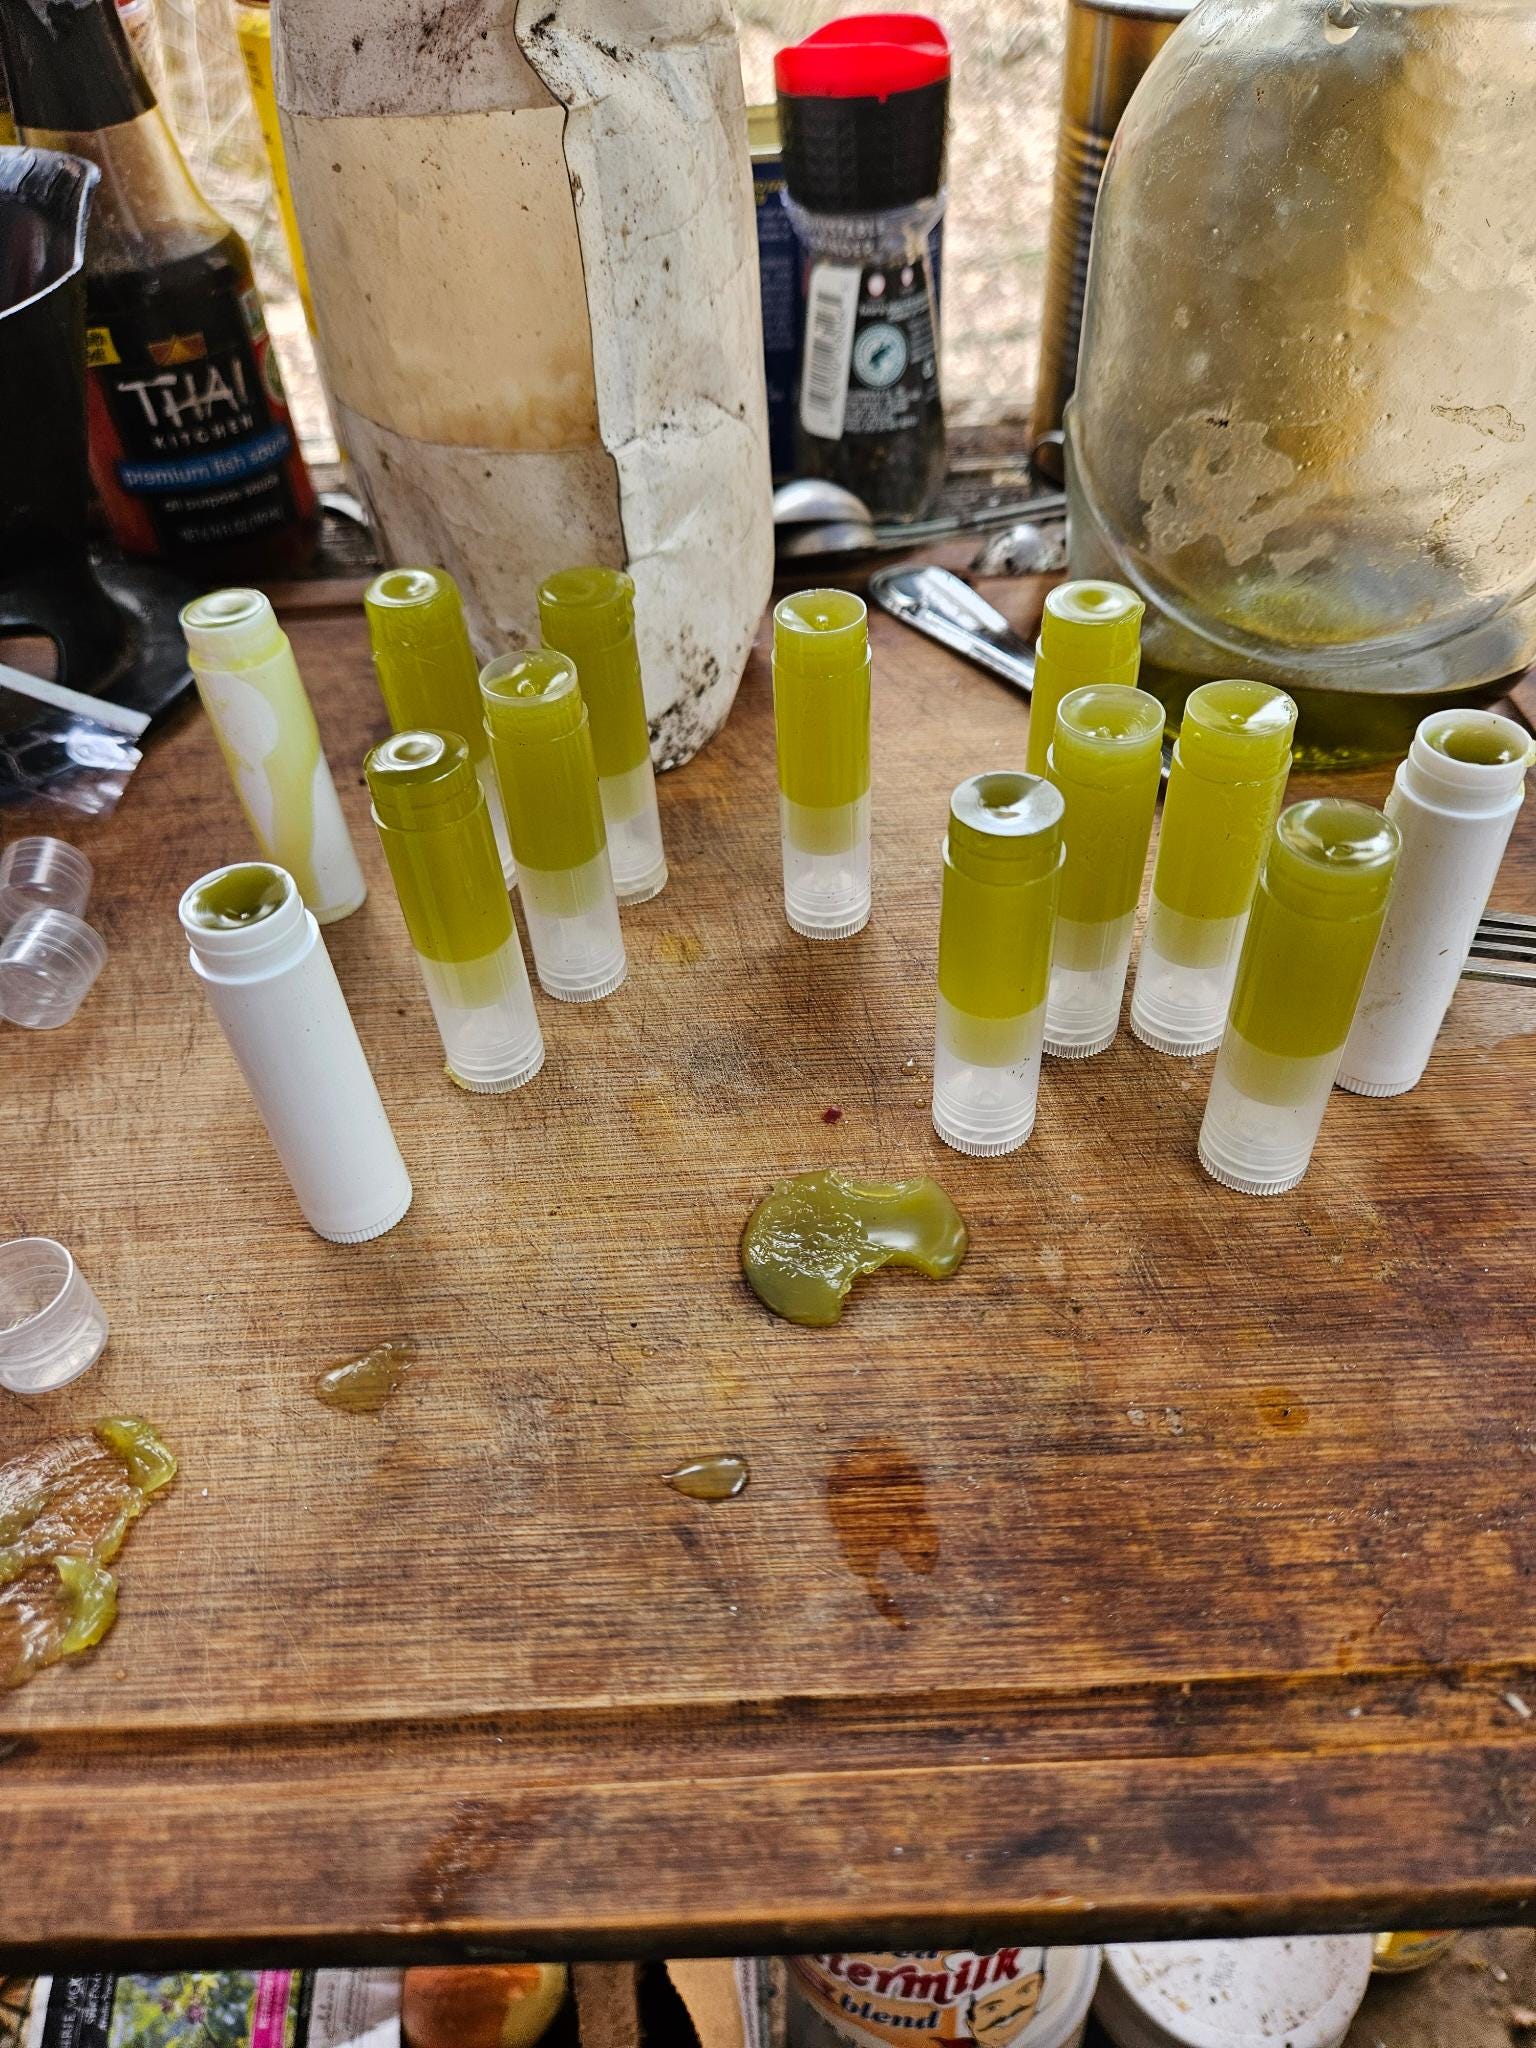
Astute caretakers of children will notice filling lip balm tubes is MESSY—and I’m an adult with allegedly fully-developed motor control. Lip balm tubes are super convenient salve containers, but maybe save filling them for older kids, and/or put down a layer of newspaper, recycled cardboard, or paper towels to make clean up easier.
Cleaning Up
Now we have some containers, utensils, and probably surfaces with goopy, oily, waxy salve on them. Let’s clean!
First, wipe as much of the salve off everything as you can with paper towels or rags. You should be able to wash any measuring cups, spoons etc. normally with dish soap and hot water after wiping them down. Hit any surfaces that got messy with a multipurpose cleaning spray or vinegar and wipe them down a second time—they should be fine after that.
If you used a jar you can’t get your whole hand into to wipe out, put about ¼ cup of regular salt and a cup of vinegar in it. Screw the lid on tight and shake, shake, shake, shake! Salt and vinegar dissolve grease the same way soap does, and the salt helps scrub away all the bits of salve you cant reach. Dump the mixture out once the jar seems cleaner. It’ll be better for your pipes to flush it down the toilet that put it in a sink drain. Wash normally.
All done!
Method two: Petroleum jelly
We can replace both the wax and oil in our recipe with one ingredient: Unscented petroleum jelly (sometimes called Vaseline). Petroleum jelly can have the same problems that paraffin wax does—it isn’t very good for your skin, and some people are allergic to it. We also HAVE to use the hot infusion method to melt the petroleum jelly, since the herbal constituents can’t dissolve into solid petroleum jelly.
Petroleum jelly is nice, because it’s very inexpensive, and it lets us skip some of the steps in method one.
Some people use coconut oil as a natural alternative to petroleum jelly. I don’t recommend this because coconut oil doesn’t make a very “stable” salve. It melts into runny liquid that can leak out of containers on warm days, and gets too hard to use on cooler days. Shea butter makes a slightly better natural alternative for a one-ingredient salve, but it can be more expensive and harder to get (check your neighborhood beauty supply/hair store). If you really want to, you can substitute the petroleum jelly in this method for coconut oil or shea butter.
Tools
A clean work surface
A clean glass jar (recycled food jars work great, so do mason jars)
A small saucepan (and stove or hotplate)
A mesh wire strainer (like a teastrainer). You can’t use a coffee filter for petroleum jelly because it will clog up.
Something to put your finished salve in, like a short jar or a small sturdy tupperware. (Petroleum jelly is a little too soft for lip balm tubes and coconut oil or shea butter will get too melty and leak out of them on sunny days).
Note for grownups: Cleaning petroleum jelly off of things is a pain. Plan ahead and only use heat-safe utensils so they’re easier to clean. In my experience, the best way to do it is to wipe as much jelly off everything as possible with paper towels, and then take all your dirty utensils and containers and put them in a big pot of soapy water. Put the pot on the stove and heat the water to a low simmer—this will melt the jelly off all of your dishes and let it float to the top of the water. Pour as much water as you can out of the pot after it’s cooled enough to handle, and then wash your dishes normally.
Directions
Follow the directions in method one to gather your plantain, sort out all the grass and other bits, rip it up into little pieces, and bruise it with your hands. Stuff it into your jar in the same way too.
Next, eyeball about how much plantain you have and add about the same amount of petroleum jelly to the jar. It doesn’t have to be exact.
Put your jar (with the lid off) into a saucepan and fill the saucepan around the jar with water. Put the saucepan on the stove on LOW heat, and cook it for about two hours.
If the water starts to boil, it’s getting too hot! Turn the heat off for ten or fifteen minutes, and then put the stove back on low.
Use a tea strainer to strain the plantain leafs out of your petroleum jelly salve. If you’re using a large-ish jar or tupperware, you can do this directly into the container you want to store the salve in. If not, pour it into another jar or a liquid measuring cup and portion it out into containers while it’s still hot and runny. You could also let it cool and use a spoon or spatula to scoop the solid salve into containers if you want.